Every business has a primary duty of care to ensure a safe work environment for its employees. This means having appropriate systems and practices to identify hazards, manage risks, and comply with regulations. Safety software can be a game-changer for many businesses, especially those growing beyond basic paper-based systems. It helps streamline compliance, engages the workforce, and provides a more efficient way to keep people safe and meet legal obligations.
However, choosing the right safety software can be daunting. There are many options on the market, with different features and pricing models. This guide will walk you through a practical, step-by-step framework to select the best safety software for your business. We’ll also cover how to assess your organisation’s readiness, what features to look for, key questions to ask vendors, and provide a handy checklist summary.
Why Safety Software Matters
Let’s briefly consider why investing in safety software is worth it. Safety culture, proactive risk management and compliance are critical to avoid penalties and protect your people and reputation. Safety software (like Safety Champion software) systematically manages health and safety and helps ensure your business complies with all current legislation. The software can help you centralise and coordinate all aspects of your safety program, including your policies, training records, incident reports, and more. Whilst reducing the administrative burden and the risk of something slipping through the cracks.
Beyond compliance, safety software drives a stronger safety culture. It makes it easier for everyone – managers and workers alike – to participate in safety. Workers can report hazards or incidents quickly (often via a mobile app), and management can respond and communicate actions in real time. In fact, introducing the right OHS software can foster a positive safety culture where employees feel like active participants rather than passive observers.
Finally, modern safety software improves efficiency and insight. No more shuffling through filing cabinets or scattered spreadsheets; instead, you get central dashboards and reports that give you an overview of your safety performance.
With the “why” established, let’s move on to the “how.” Below is a step-by-step framework to guide you through selecting the right safety software for your business.
Step 1
Clarify your WHS objectives and needs
What do you need your safety software to achieve?
This first step is about clarifying your objectives, both in terms of legal compliance and business goals. Consider questions like:
- Are you trying to improve basic compliance and record-keeping?
- Are you looking to reduce the administrative load of safety paperwork?
- Do you need better oversight across multiple sites or projects?
Or perhaps you’re aiming for a higher standard (like aligning with ISO 45001 or meeting prequalification requirements for clients).
Some industries have specific regulations or stringent client requirements. Determine if you need to meet minimum WHS Act or Law obligations, or if you’re pursuing an integrated management system that might also cover quality or environment.
Identifying your “why” will help shape your “what.”
Take the opportunity to document your requirements at a high level. For example, you might write: “We need a solution to manage incident reporting, risk assessments, and track training, with reminders for recurring safety tasks.”
Having a clear scope will keep you focused when you start evaluating options. It can be helpful to prioritise your needs into “must-haves” and “nice-to-haves.” Perhaps mobile access for on-site reporting is non-negotiable, or integration with your existing HR system would be a bonus. The clearer you are on your needs, the easier it will be to identify which software is the right fit.
Tip: It’s also useful to articulate the benefits you expect. For instance, you might aim to minimise risk to employees and reduce the likelihood of incidents, thereby protecting your people and your business’s reputation. Or you might want to improve efficiency by systematically planning training and resources. These goals will help you build a strong internal case for the software (especially if you need approval from upper management for the purchase).
Step 2
Assess your internal readiness
Before diving into product features and demos, take a good look inward.
Is your business ready for a safety software implementation?
This step is about ensuring you have the foundational pieces in place and understanding what might need to change internally to get the most out of a new system.
Start by gathering and reviewing your current WHS documentation and processes. What do you already have? Common documents include your safety policy, procedures, risk registers, audit checklists, etc. Make an inventory of these. A software system will require you to input or upload such information, so having it organised is useful. Defining your software specs involves listing the documents and data you’ll want to manage in the system.
Next, consider people and roles. Who will be the internal champion for the safety software project? You should also identify the key stakeholders: for example, department managers who will need to use the system, worker representatives or HSRs (Health and Safety Reps) who should be involved, and IT support if applicable (for technical setup or integrations).
Assess your current systems as well. Are you moving from completely paper-based, or do you have some digital tools already? Knowing this will influence how you migrate data and how much change management is needed for your team. If your workforce isn’t very tech-savvy, you’ll want a particularly user-friendly solution and a good training plan. On the other hand, if you’re already partially digital, consider what existing systems need to connect with the new software?.
At this stage, it’s also wise to consider your budget and timeline. While we’re not costing solutions yet, have a ballpark idea of what resources you’re willing to invest.
Lastly, ensure management is on board. Implementing a new safety system is much smoother with visible support from leadership. This reinforces the importance of the project to everyone in the organisation. As Safe Work Australia notes, safety leadership from the top is crucial – when owners and managers lead a culture of positive safety practices, workers are more likely to follow procedures and speak up about.
By the end of Step 2, you should have a clear picture of where you stand, what safety processes and data you have, who will be involved in the software project, and any internal constraints to consider (like budget or tech limitations). This self-assessment prepares you for productive conversations with vendors and a smoother implementation later.
Step 3
Define key requirements and features (your “Wish List”)
Now for the fun part: defining exactly what you want the safety software to do. Based on your objectives and current gaps, you can create a checklist of key features and capabilities needed.
Start with the core safety functions. Most WHS/OHS software solutions offer modules or features that align with elements of a safety management system. Common modules include:
Risk & Hazard Management – tools to record hazards, conduct risk assessments, and track control measures. For example, the software should let you identify hazards, evaluate risks, and monitor your controls’ effectiveness. If your business requires field hazard reports or pre-start checks, look for a feature to capture those easily (preferably on mobile).
Incident Reporting & Investigation – a central place to log incidents, near-misses, and injuries, with workflows to investigate and record corrective actions. Key features might be quick incident report submission, automated notifications to the right people, and tracking of follow-up actions and incident trends.
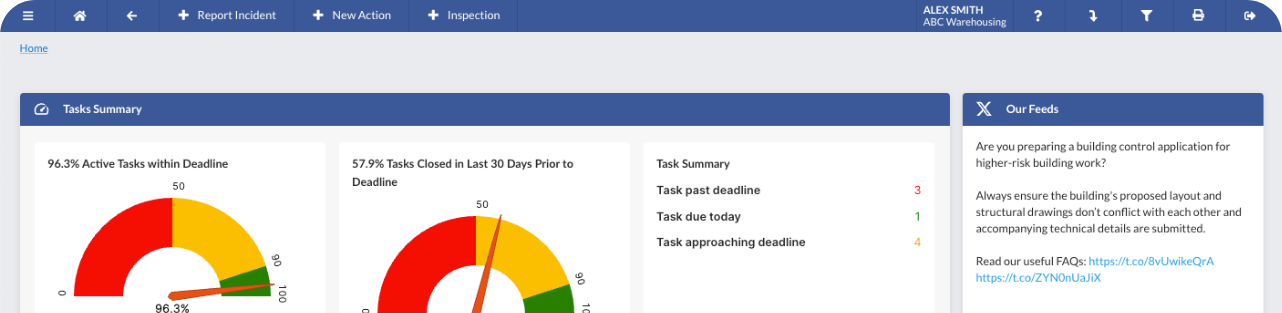
Safety Actions & Task Management – the ability to assign and track safety-related tasks. This could cover corrective actions from incidents, audit findings, maintenance schedules, or any preventative tasks. The system should send reminders and allow you to see what’s done or overdue.
Compliance Management – features that help you manage legal obligations and audits. For example, the software might help keep track of regulatory requirements and changes, manage your registers for compliance (like chemicals or equipment), and generate compliance reports.
Training and Competency Tracking – a module to record employee training, qualifications, licenses, and schedule refresher training. This is crucial for ensuring all staff are competent for their tasks and for demonstrating compliance with training requirements.
Document Management – a central library for all your safety documents: policies, procedures, SWMS, forms, etc. Important features include secure storage with easy retrieval, version control (so you keep track of updates to documents), and the ability to distribute updates to staff.
Beyond these core areas, consider any special requirements of your business. For instance, a Contractor Management feature could be valuable if you engage contractors frequently. If you have hazardous chemicals, you might need a chemical register and SDS management.
Also, think about the user experience and practicalities. For any business, ease of use is paramount. So you want software that is intuitive and user-friendly. Features that support this include a good mobile app (for reporting hazards or doing inspections on the go) and a simple, clean interface for all users. In fact, mobile capability is often a must-have: your software should allow web and mobile access so staff in the field or on site can use it easily.
Configurability is another consideration. For example, can you add your own incident categories? Create custom inspection checklists? Ideally, the software should be configurable without always needing vendor support. Many modern platforms offer a degree of self-service configuration, which is worth looking for.
Finally, note any integration needs: if it’s important that the safety software talks to other systems, mark that down.
Once you have this list of requirements and desired features, you have essentially created a feature checklist. This list will guide your research and conversations with vendors – you’ll check which solutions tick most of the boxes.
Essential feature and function checklist
Risk & Hazard Management: Tools for hazard identification, risk assessments, and control tracking (e.g. risk register, ability to assign risk ratings and monitor controls)
Incident Reporting & Management: Easy incident/near-miss reporting (via desktop and mobile), with automated notifications, investigation workflows, and corrective action tracking.
Action and Task Tracking: A system to assign safety actions (from incidents, inspections, etc.) to people with due dates, and receive reminders/escalations for overdue tasks.
Audit and Inspection Tools: Ability to create checklists or forms for workplace inspections, audits, or observations, and record the findings and actions from those inspections.
Compliance Management: Features that help manage compliance obligations, maintain registers, and keep an audit trail of compliance. Bonus if the software provides updates or guidance on changing WHS regulations.
Training & Competency Tracking: Database of worker training records and certifications, with scheduling for upcoming training, reminders for renewal (e.g. first aid certificates), and reporting on training status
Document Management: Central repository for all safety documents. Should include version control, permission controls, and easy sharing of documents with staff.
Reporting & Analytics: Built-in reports and dashboards that give insight into safety performance, e.g., incident rates, hazard trends, completion of safety tasks, and training compliance percentage. The ability to customise reports or export data for analysis is a plus.
Mobile Accessibility: A robust mobile app that workers and managers can use to perform key actions or access a procedure on a tablet. This greatly improves engagement and real-time reporting.
User Friendliness: Look for modern, clean design and perhaps self-service features (like employees being able to log in to see their own training status or submit reports without complicated steps).
Integration Capabilities: (If needed) the ability to integrate or import/export data with other systems you use – for example, syncing employee info from your HR system or sending incident data to an insurance or workers’ comp system.
Scalability and Flexibility: Ensure the software can grow with you. If you plan to expand operations or hire more staff, can the system handle a larger user base or more records?
Data Security & Hosting: Given sensitive information (like injury records) will be stored, confirm that the software uses secure data practices. Reputable vendors will often have security certifications (e.g. ISO 27001) or at least detailed information on how they protect your data.
Use the above list as a reference when reviewing any product. You might even score each vendor on these features to see which best meets your needs.
Step 4
Research and shortlist potential solutions
Armed with your requirements, you can now survey the market and see what options are available. This step involves doing your homework and narrowing down to a handful of promising candidates.
Start with research: When researching, consider the size and industry fit. Some safety software solutions are geared toward large enterprises and might be overkill (and overpriced) for your company. Others target small to mid-size businesses and pride themselves on simplicity and affordability. Look at the vendor’s website for clues: do they mention solutions for small or medium businesses? It’s important to pick a system that matches your scale.
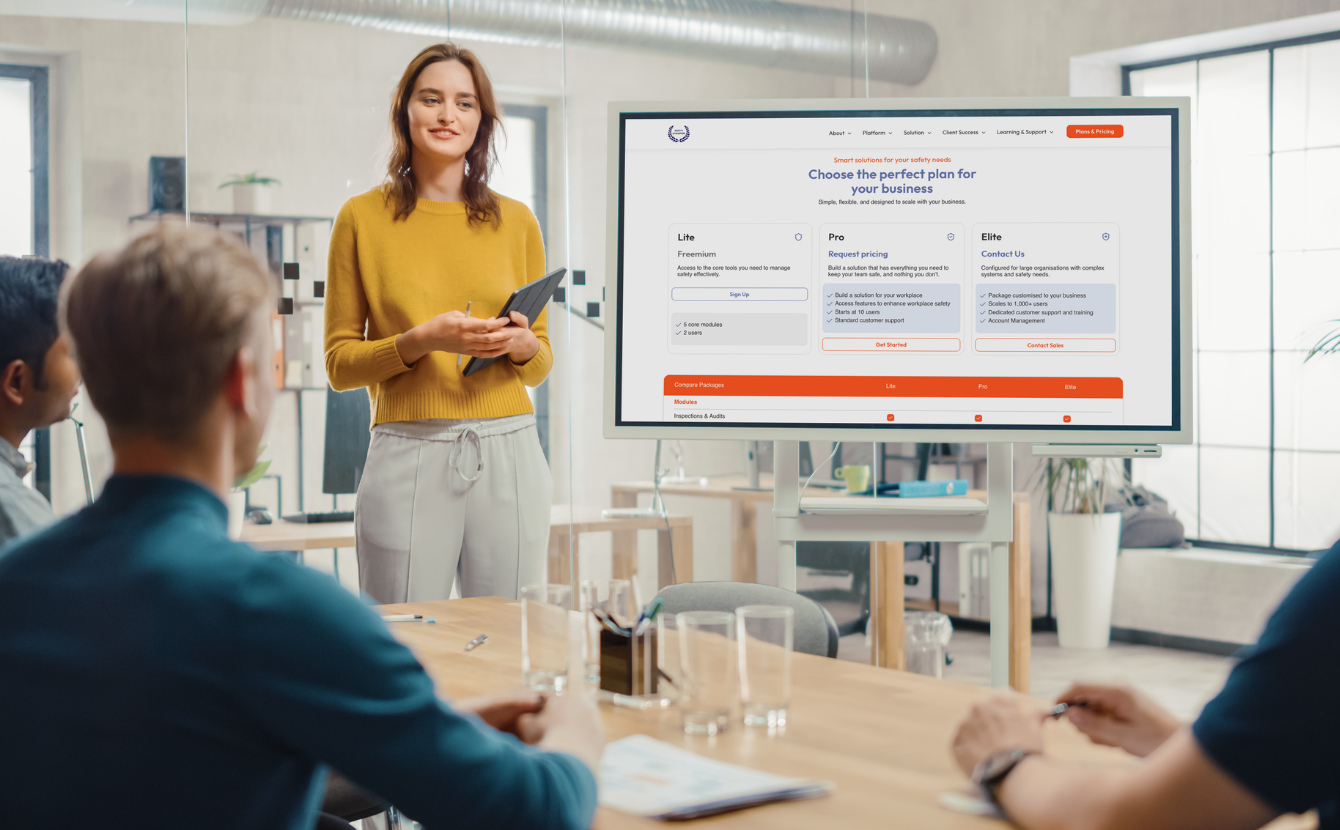
Make a shortlist: Perhaps 3–5 vendors meet your needs. At this stage, you might list key info for each: Does it have the core features you need? Is it cloud-based (most are nowadays, but double-check if any require on-premise servers)? Does the pricing model seem to align with your budget? Also consider the vendor’s longevity and credibility – how long have they been around, and do they have known clients or endorsements? Remember, you’re not just buying software, you’re entering a partnership with the provider, so you want them to be stable and supportive.
Step 5
Evaluate vendors - questions to ask
With your shortlist in hand, engage with those vendors to get the details you need. This usually involves visiting their website for detailed info, downloading brochures, and most importantly, connecting with their team. Treat the discussions and subsequent demo as a two-way interview: they’re showing you their product, and you’re assessing if it’s the right fit. Come prepared with questions! Here are some practical tips and critical questions to consider:
1. Feature Fit: Review your feature checklist and ask the vendor to show how their system meets each need.
2. Ease of Use: During the demo, pay attention to how intuitive the interface looks. You might ask, “What feedback do your small business clients give about the user experience? How much training is typically needed for a new user?” If possible, involve a potential end-user from your team in the demo to get their perspective.
3. Vendor Support and Reputation: A key element in choosing a provider is their service and support reputation. Ask about what support is included – for instance, “Do we get a dedicated account manager or implementation specialist?” and “What is your usual response time for support queries?”.
4. Technical Details and Configurability: Clarify how much you can configure on your own. “If we need to change a form or add a new checklist, can we do that ourselves, or do we need to go through your support?”. Also ask about integrations (if needed): “Do you have an API or existing integrations with systems like Xero/QuickBooks, HR systems, etc.?”.
Check the mobile capabilities – “Is there a mobile app? What can users do on the mobile vs desktop?” Since many workers are field-based, a robust mobile app is often crucial.
5. Pricing and Transparency: Understand the pricing structure clearly. Some software has an all-inclusive subscription, while others charge per user or per module. Ask “How do you price your product for a company of our size? Are there any additional costs (e.g. for extra modules, support, storage, future upgrades)?”. A good vendor will be transparent about costs.
6. Data and Security: Given increasing concerns around data, don’t forget to ask about data security and ownership. “Where is our data hosted? Who can access it?”. Also, “What happens to our data if we ever leave the service – can we export it easily?”. While small businesses might not have a CIO grilling vendors on cybersecurity, it’s still prudent to ensure the provider follows good practices (most will highlight this in their materials).
7. Implementation and Training: Have the vendor outline the typical onboarding process. “How long does implementation usually take for a client of our size?” and “What support do you provide during setup?”. Also, ask about training resources: “Do you offer on-site training, online webinars, or an online knowledge base for new users?”.
8. Future Development: It can be insightful to ask what features or improvements are on the roadmap. This shows how responsive the company is to emerging needs. You want a vendor that is continuously improving their product, ideally with input from customers like you.
During the evaluation, keep notes on each vendor. It might help to make a simple scorecard for each based on your key criteria (features, usability, support, cost, etc.). After demos, you could also give some of your team a chance to weigh in – especially those who will be day-to-day users. Sometimes, a short trial where you can “play around” in the software yourself is invaluable. If a free trial is available, take advantage of it.
In summary, ask plenty of questions. Good vendors will appreciate that you’re thorough. Make sure you get answers that give you confidence in the product and the people behind it.
Step 6
Decision to implementation
Hopefully, after your experience with step 5, you have decided which safety software solution is right for you and your team.
Once you’ve made your decision (congratulations!), it’s time to plan for a successful implementation. This goes slightly beyond choosing the software, but it’s a crucial final step to realise the benefits of your choice. After all, a tool is only as good as its adoption.
Work with the vendor to outline an implementation plan. Revisit the internal readiness work from Step 2 – now you’ll put those plans into action. Key things to consider in your rollout plan:
Data Migration: Decide what existing safety records you want to bring into the new system. This could include past incident records, training histories, open action items, etc. Many vendors will assist with bulk importing data (e.g. via Excel upload). Identify those data sources (your spreadsheets, documents) and prepare them.
System Configuration: This is where you tailor the software to your organisation. Configure user roles and permissions (who sees what), add your risk matrix settings, upload your company logo/branding if applicable, and set up any custom fields or forms you need. The vendor’s onboarding specialist can typically guide you here. It’s wise to configure it in a test environment first, if available, and then go live.
Training Your Team: Plan how you will train the various users. You might do a kickoff meeting to introduce the new software and why it’s being adopted (emphasising the positive impact on safety and how it makes work easier). Then, hands-on training sessions: perhaps one for managers on how to run reports and monitor, and another for general staff focusing on how to log hazards/incidents and access documents. Leverage any training resources the vendor provides – guides, videos, or live webinars. The goal is to ensure everyone knows how to do the basic tasks they’ll need to do. Encourage questions and feedback during training.
Gradual Rollout vs Big Bang: Decide if you’ll roll it out all at once to the whole company or start with a pilot group or single department. Smaller organisations might find it easiest to switch over all at once (especially if replacing a manual system).
Monitoring and Adjustment: As you go live, keep a close eye on how it’s going. Check if people are logging in and using it as expected. You may need to send reminders or provide follow-up coaching. It’s normal to tweak some settings after initial use—maybe you need to add a new category or find a setting that needs adjustment. Maintain a dialogue with your vendor at this early stage.
Ongoing Upkeep: Assign responsibility for ongoing administration. Someone should regularly review the system’s data—e.g., ensure new employees are added and inactive ones removed, run monthly reports to monitor open actions, etc. Depending on your setup, this could be the safety champion or an office manager. The software will lighten your load, but it’s not “set and forget”—ongoing attention ensures you get the full value (and stay compliant).
Implementing safety software is an investment in better safety performance. Done right, you’ll soon notice improvements: tasks not being missed, faster incident responses, and a general uptick in safety awareness. Plus, reporting to executives or regulators becomes easier when you can pull data with a few clicks. Celebrate these wins with your team – it will reinforce the positive culture.